
Hello Again
It’s been a while – hope you haven’t missed me too much 🙂
When I posted for the Creative Inkers Christmas Holiday Blog Hop I mentioned that I had also made some non-Christmas cards with the Festival of Trees bundle and the technique I’d presented at the Stampin’ Up! Party Time in Wellington last month. Today I’ll share those cards.
If you’d like to read about the Ombre Technique using White Craft Ink then check out that post HERE.

Festival of Trees Bundle
Now I LOVE the many ways the Festival of Trees photopolymer stamps and punch can be used to make a huge range of Christmas cards, but it is also good to know these trees and punch can be used to make cards for all sorts of occasions – not just Christmas. So the bundle is a great investment – and an awesome bargain at just $59.25!
The white notecards make a great base for a quick thank you card in Tempting Turquoise. I love how the tree image can be stamped and punched from the inside of a 2 1/2 inch circle – too cute.
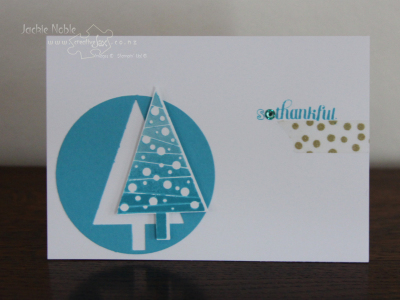
I used the “sothankful” sentiment from the Project Life Holiday Cheer stamp set and added a rhinestone that I’d coloured with the Coastal Cabana Blendabilities Markers. I try to think of different ways to use stamps and find the Project Life ones are great for cards as well as for memory keeping. A little splash of gold washi tape (Watercolor Wonder) ties in with the dots on the tree.

Project Life Holiday Cheer Photopolymer
In keeping with the ombre theme, my tri-tree card has two types of ombre happening – the gradient of colour achieved on each tree with the White Craft Ink and also a gradient of colour from Cherry Cobbler, through Blackberry Bliss to Night of Navy.
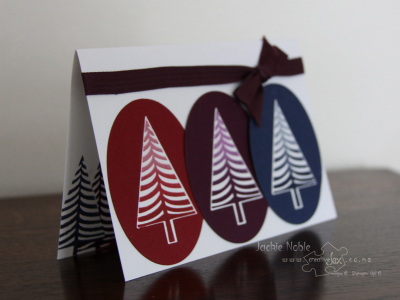
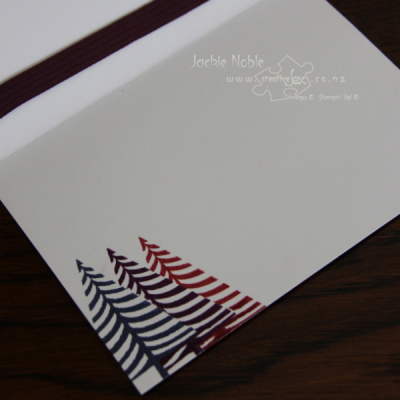
This time I used my oval framelits to surround a punched tree shape. Next I stamped and punched the tree on Whisper White and then inlaid the punched image into the negative space left in the oval. On the inside of the card I stamped three overlapping trees – masking each image with one of the previously punched tree shapes. You can see the result a bit more clearly in the image below. I rather like the graphic feel of this particular tree image. In fact the range of trees is one of the things I really love about the stamp set.
A very different tree – the floral image makes a beautiful sympathy card. Again I’ve stamped three images – this time in Blackberry Bliss, Mossy Meadow and Night of Navy. But rather than punch the trees out, for this card I have matted each image on matching cardstock and then used dimensionals to adhere these panels to the card base.
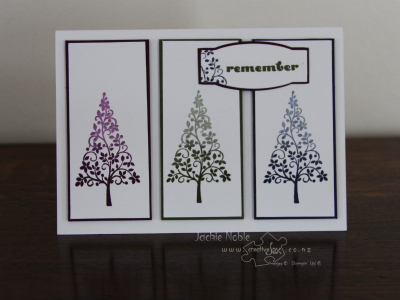
And again I’ve used a Project Life Stamp – this time from the Remember This set. I used my Stampin’ Write marker to colour just the word I wanted rather than the whole sentiment. I’ve cut it out using the Project Life Cards and Labels Framelits.

Project Life Remember This
The last card using the ombre effect I’ve got to share today is somewhat different that the others. One of the very first cards I made using the Tree punch was a paper quilt card that used the triangle shape of the tree (you can see that in my post HERE). As I was making that card, I decided I wanted to experiment with the triangles some more and thought the graphic tree image would be fun to play with.
As it turns out, nine trees can be punched and joined to make a perfect nonagon. Rather than trial and error – I worked this out before I started playing. “How did you do that?” I hear you asking … well I measured the angle of the tip of a tree to calculate if I was going to be able to make a shape with the trees. The tip has an angle of 40 degrees, which divides into 360 degrees exactly 9 times – so – dada – I knew it would work and I knew how many trees to make!
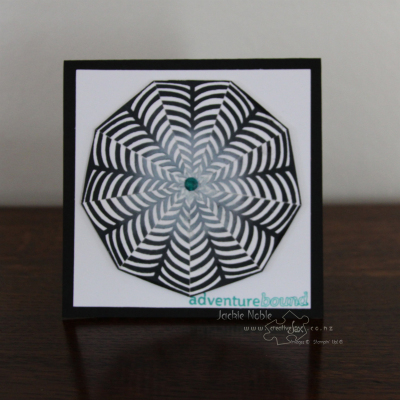
As the tree is so angular – or graphic looking – I chose to make the card in predominantly black and white for extreme contrast. I’ve added a splash of colour in the Bermuda Bay sentiment and the coloured rhinestone. I was really pleased with how this card turned out!
I hope you’ve enjoyed seeing some other things that you can do with the Festival of Trees Stamp Set and Punch. I’d love to see your creations – add a link in the comments below.![]()
Until next time
Jackie
As always – if you wish to know anything more about info in this post, or to get a catalogue or to buy any of the items mentioned in the post, please contact me.
Or you can shop 24/7 at my online Stampin’ Up! shop – just click on any of the products in the table below, and you should find yourself in my online shop at the page with information about the product.
If you would like to find out about joining my Stampin’ Up! Team (thINK Creative) – get in touch – I would love to chat to you about that.
You can receive my Blog Posts directly by email or join my monthly Newsletter group – you can subscribe using the buttons at the right of my page.


1 comment
Great to see how maths skills are so handy in everyday life … love the created card also! 🙂